
House Rental Management System is developed using PHP, CSS, bootstrap, and JavaScript. Talking about the project, it contains an admin side from where a user can manage the house, tenants, payments, and much more. In this project, the user has to perform all the main functions from the Admin side.
About System
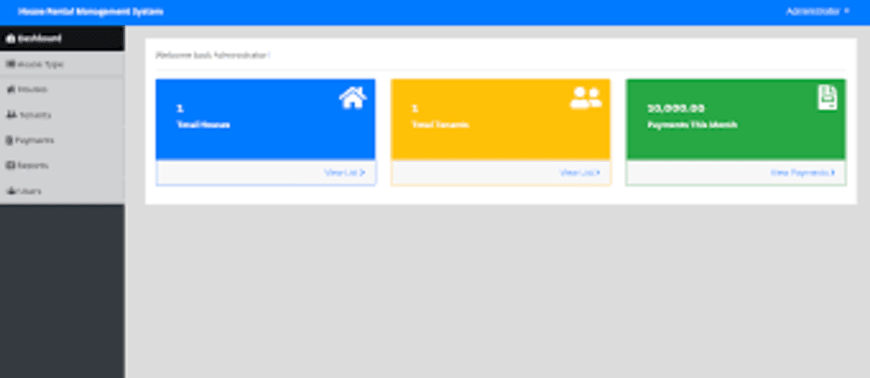
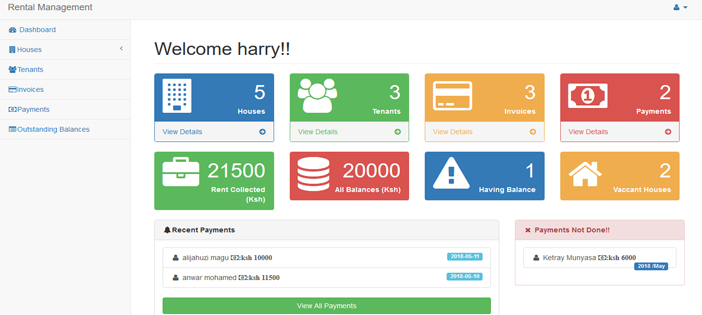
Talking about the features of the House Rental Management System, the admin can manage the house by entering details such as house number, features, rent, and status. In order to add tenants, the user has to enter the full name, gender, national id, phone number, email, registration date, house, agreement document, status, and exit date. Besides, the admin can add invoices and payments too. For payment, the user has to select a tenant, paid amount, balance, date, and comments. Other features include displaying of remaining payments, recent payments, and collected rents.
Design of this project is pretty simple so that the user won’t find any difficulties while working on it. House Rental Management System in PHP helps the user in managing rental records and payments. To run this project you must have installed virtual server i.e XAMPP on your PC (for Windows). House Rental Management System in PHP with source code is free to download, Use for educational purposes only! For the project demo, have a look at the Video below.
Features:
- Login/Register System
- Manage House, Tenant
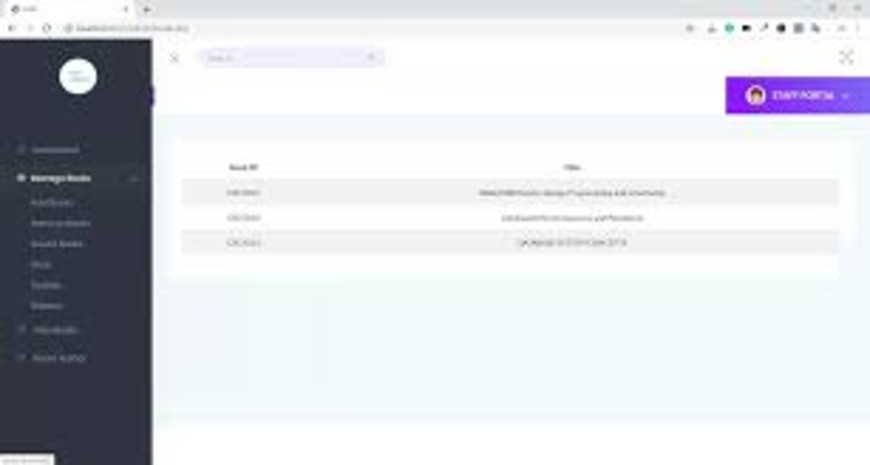
- Manage Invoice, Payments
- View Remaining payment, in complete payments
How To Run??
After Starting Apache and MySQL in XAMPP, follow the following steps.
1st Step: Extract file
2nd Step: Copy the main project folder
3rd Step: Paste in xampp/htdocs/
Now Connecting Database
4th Step: Open a browser and go to URL “http://localhost/phpmyadmin/”
5th Step: Then, click on the databases tab
6th Step: Create a database naming “rentalmanagement” and then click on the import tab
7th Step: Click on browse file and select “rentalmanagement.sql” file which is inside “DATABASE” folder
8th Step: Click on go.
After Creating Database,
9th Step: Open a browser and go to URL “http://localhost/rentalmanagementtrial/”
Functionalities:
- Login/Register System: Users (likely admins) can log in or register to access the system's functionalities.
- Admin Panel:
-
- Manage Houses:
- Add new house listings with details like house number, features, rent amount, and availability status.
- Potentially edit or update existing house information.
- Manage Tenants:
- Add new tenants, including details like name, contact information, national ID, and registration date.
- Associate tenants with specific houses.
- Manage tenant statuses (active, inactive, etc.) and potentially record exit dates.
-
- Manage Invoices and Payments:
- Create invoices for tenants, specifying the amount due, date, and additional comments.
- Record rental payments received from tenants, including amount paid, remaining balance, and date.
- View Reports:
- View reports on remaining rental payments for each tenant.
- View reports on recent payments received.
- Track total collected rents over a period (reports might be limited in this basic system).
-
- Manage Houses:
Benefits of the System:
- Organized Management: Simplifies managing house listings, tenants, invoices, and rental payments.
- Improved Tracking: Helps track rental income, outstanding balances, and recent payments.
- Efficient Communication (Optional): The system might allow sending notifications or reminders to tenants regarding payments (depends on specific implementation).
Setup and Usage on XAMPP Server:
Download and Extract:
- Download the system's source code (likely a zipped folder).
- Extract the downloaded file to a convenient location on your computer.
-
Copy to XAMPP htdocs folder:
- Open your XAMPP installation directory. This is typically
C:\xampp\htdocson Windows. - Copy the extracted project folder from step 1 into the
htdocsfolder.
- Open your XAMPP installation directory. This is typically
Create and Import Database:
- Open a web browser and go to
http://localhost/phpmyadmin/. This opens phpMyAdmin, a tool to manage your MySQL database. - Click on the "Databases" tab.
- In the "Create database" field, enter a name for your database (e.g., "rentalmanagement" as mentioned in the description). Click "Create" to create the database.
- Click on the "Import" tab.
- Click on "Browse file" and select the
rentalmanagement.sqlfile that likely came with the downloaded source code. This file contains the database schema and initial data (if any). - Click on the "Go" button to import the SQL file.
-
- Open a web browser and go to
Run the System:
- Open a web browser and navigate to
http://localhost/<project_folder_name>. Replace<project_folder_name>with the actual name of the folder you copied into thehtdocsdirectory in step 2.
- Open a web browser and navigate to
Important Notes:
- The video link (https://m.youtube.com/watch?v=gBWfEbzUAGE) provides a video demonstration of the system.
- This is likely a simple project for educational purposes. You may need a more robust system for commercial property management.
- Security: When using downloaded code, ensure proper security measures are implemented to protect user data, especially tenant information and financial details.
-
0 comments